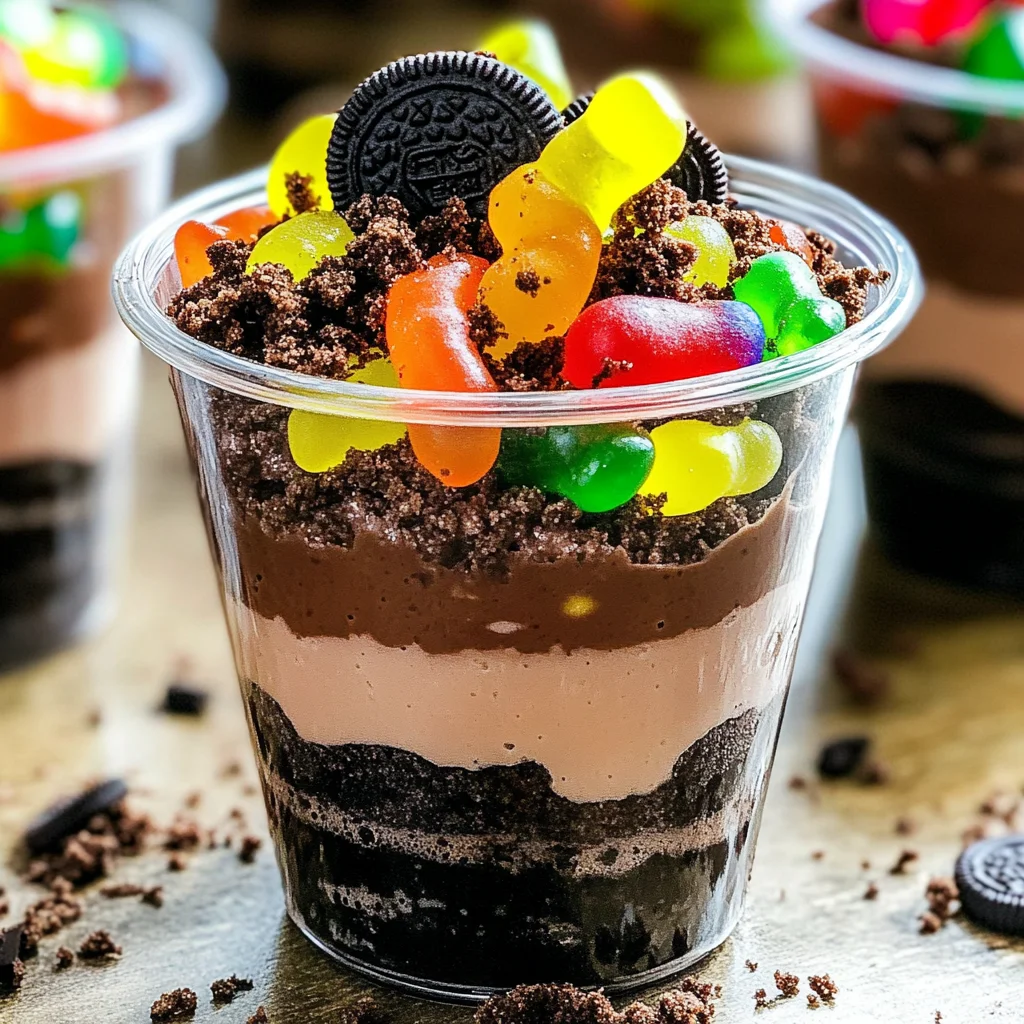
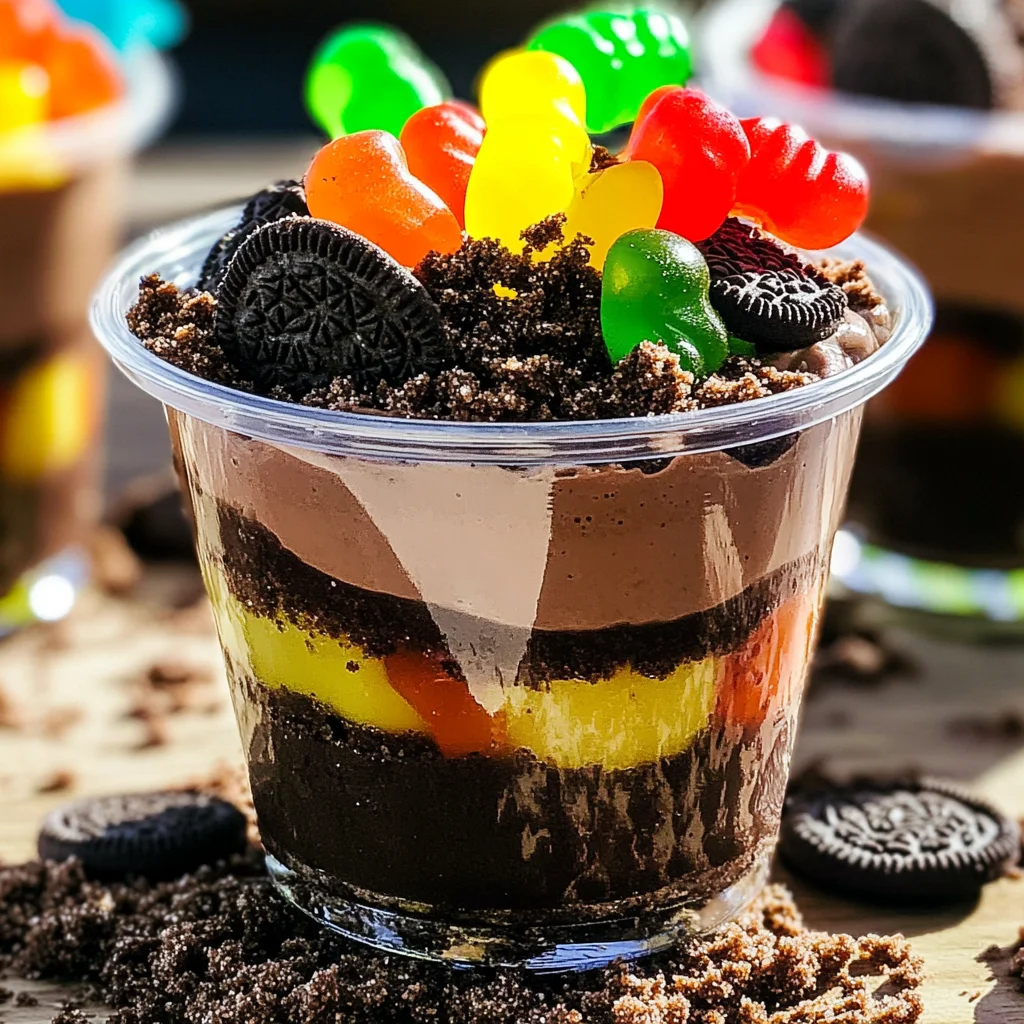
Dirt Cups
Layers of delicious chocolate pudding, crushed Oreos, and playful gummy worms make Dirt Cups a fun and whimsical dessert for any occasion. Whether it’s a birthday party, Halloween gathering, or simply a treat for the kids, these cups are sure to delight both young and old alike. Easy to prepare and visually appealing, Dirt Cups are not just tasty but also offer the thrill of digging into a sweet dirt experience.
Why You’ll Love This Recipe
- Quick to Prepare: With just 10 minutes of prep time, you can whip up this delightful dessert in no time.
- Kid-Friendly Fun: Children will love the combination of flavors and the excitement of finding gummy worms in their dirt.
- Versatile Serving Options: Serve them in individual cups or as a larger dessert for sharing; they fit any event perfectly.
- No Baking Required: These Dirt Cups are a no-bake dessert, making them ideal for warm days or quick gatherings.
- Customizable: Feel free to add different toppings like sprinkles or use different candies to suit your theme.
Tools and Preparation
To create these fun Dirt Cups, you’ll need some essential kitchen tools. Having the right equipment will make your preparation smoother and more enjoyable.
Essential Tools and Equipment
- Mixing bowl
- Whisk
- Glasses or cups
- Spoon
Importance of Each Tool
- Mixing bowl: A sturdy mixing bowl is essential for combining your pudding mix and milk effectively.
- Whisk: Using a whisk helps achieve smooth pudding without lumps, ensuring perfect consistency.
- Glasses or cups: Clear glasses allow you to showcase the beautiful layers of the Dirt Cups, adding visual appeal.
- Spoon: A spoon is necessary for both serving and layering your ingredients neatly.
Ingredients
Layers of chocolate pudding, crushed Oreos topped with gummy worms!
For the Pudding Base
- 3.4 ounces box instant chocolate pudding mix
- 2 cups milk
For the Topping
- 8 ounces whipped topping (thawed)
- 10-12 Oreo cookies (crushed)
- 32 gummy worms
How to Make Dirt Cups
Step 1: Combine Pudding Mix and Milk
In a medium bowl, add cold milk and sprinkle pudding over top. Whisk until well combined.
Step 2: Let It Thicken
Allow the mixture to sit for about 5 minutes so it can thicken properly.
Step 3: Fold in Whipped Topping
Gently fold in the whipped topping until everything is well incorporated.
Step 4: Spoon into Serving Cups
Using a spoon, carefully spoon the pudding mixture into glasses or cups.
Step 5: Add Crushed Oreos
Sprinkle crushed Oreo cookies on top of each cup filled with pudding.
Step 6: Top with Gummy Worms
Place 4 gummy worms on top of each cup for that signature dirt look.
Step 7: Chill Before Serving
Refrigerate the Dirt Cups until you’re ready to serve them. Enjoy this fun dessert chilled!
How to Serve Dirt Cups
Dirt Cups are a fun and creative dessert that can be enjoyed in various ways. These delicious layers of chocolate pudding, crushed Oreos, and gummy worms are perfect for parties, kids’ events, or just a sweet treat at home. Here are some serving suggestions to make your Dirt Cups even more special.
Individual Cups
- Present each Dirt Cup in clear plastic cups to showcase the beautiful layers.
- Use small cups for a bite-sized treat at gatherings.
Party Platter
- Arrange multiple Dirt Cups on a large platter for easy serving.
- Decorate the platter with extra gummy worms and crushed Oreos for a whimsical touch.
Themed Events
- Create themed Dirt Cups for holidays or special occasions by adding colored sprinkles.
- For Halloween, consider using black and orange decorations to enhance the spooky vibe.
DIY Station
- Set up a DIY Dirt Cup station where guests can assemble their own cups.
- Provide toppings like additional gummy candies, chocolate chips, or nuts for customization.
How to Perfect Dirt Cups
Creating the perfect Dirt Cups requires attention to detail. Follow these tips to elevate your dessert game.
- Use cold milk: Make sure your milk is cold when mixing it with the pudding mix. This helps achieve a thicker consistency.
- Fold gently: When combining whipped topping with pudding, fold gently to maintain the light and airy texture.
- Chill before serving: Allow your Dirt Cups to chill in the refrigerator for at least 30 minutes. This enhances flavor and makes them easier to eat.
- Layer thoughtfully: Layer your ingredients carefully for an appealing visual effect. Start with pudding, then add Oreos, and finish with gummy worms on top.
Best Side Dishes for Dirt Cups
While Dirt Cups are delightful on their own, pairing them with side dishes can create a well-rounded dessert experience. Here are some great options:
-
Fruit Salad
A refreshing mix of seasonal fruits adds brightness and contrast to the rich flavors of Dirt Cups. -
Ice Cream Sundae Bar
Set up an ice cream station with various toppings that guests can customize alongside their Dirt Cups. -
Chocolate Chip Cookies
Classic cookies provide a chewy texture that complements the creamy layers of your dessert. -
Brownies
Fudgy brownies pair perfectly with the sweetness of Dirt Cups for a double chocolate treat. -
Mini Cheesecakes
Light and creamy cheesecakes balance out the heaviness of the pudding dessert nicely. -
Popcorn Mix
A sweet popcorn mix can add crunch and fun flavors that contrast beautifully with the soft textures of the Dirt Cups.
Common Mistakes to Avoid
Making Dirt Cups can be fun, but there are common mistakes that can ruin your dessert. Here are a few to watch out for:
- Incorrect pudding consistency: If you don’t let the pudding thicken properly, your Dirt Cups will be runny. Be sure to whisk the pudding mix with milk and let it sit for at least 5 minutes.
- Overmixing whipped topping: Gently fold in the whipped topping. Overmixing can cause it to lose its fluffiness, affecting the texture of your Dirt Cups.
- Using stale Oreos: Fresh cookies are crucial for a great taste and texture. Always check your Oreo cookies for freshness before crushing them.
- Skipping the chilling step: Chilling helps all the flavors meld together. Allow your Dirt Cups to chill in the fridge until ready to serve for the best results.
- Not layering correctly: For an appealing presentation, layer your ingredients thoughtfully. Start with pudding, then Oreos, and finish with gummy worms on top.
Storage & Reheating Instructions
Refrigerator Storage
- Store in airtight containers to maintain freshness.
- Dirt Cups can last up to 3 days in the refrigerator.
Freezing Dirt Cups
- It’s not recommended to freeze Dirt Cups as they can alter the texture of the pudding and whipped topping.
- If you must, store in freezer-safe containers for up to 2 months.
Reheating Dirt Cups
- Oven: Not suitable; best enjoyed cold.
- Microwave: Avoid reheating as it may affect texture; serve chilled instead.
- Stovetop: Not recommended; enjoy fresh from the fridge.
Frequently Asked Questions
Here are some common questions about making Dirt Cups:
What are Dirt Cups?
Dirt Cups are a fun dessert made of layers of chocolate pudding, crushed Oreos, and gummy worms that resemble dirt and worms.
Can I use other types of cookies in my Dirt Cups?
Yes! You can substitute Oreos with other chocolate cookies or even graham crackers for a different flavor.
How do I make vegan Dirt Cups?
You can make vegan versions by using plant-based milk and dairy-free whipped topping along with vegan cookie options.
How long do Dirt Cups last in the fridge?
Dirt Cups will stay fresh in an airtight container for about 3 days when stored properly in the refrigerator.
Final Thoughts
Dirt Cups are a delightful dessert that brings joy to both kids and adults alike. Their layers of rich chocolate pudding combined with crunchy Oreos create a nostalgic treat perfect for any occasion. Feel free to customize them by adding different candies or toppings according to your taste!
Dirt Cups

Dirt Cups are a whimsical and delightful dessert that captures the essence of childhood joy. With layers of rich chocolate pudding, crunchy crushed Oreos, and playful gummy worms, these treats are perfect for any occasion—from birthday parties to Halloween festivities. Not only are they visually appealing, but they’re also incredibly easy to make. In just 10 minutes of preparation, you can whip up a batch that will leave both kids and adults grinning with delight. The no-bake nature of this recipe makes it an ideal choice for quick gatherings or warm days when you want a sweet treat without the fuss.
- Prep Time: 10 minutes
- Cook Time: None
- Total Time: 0 hours
- Yield: Makes approximately 4 servings 1x
- Category: Dessert
- Method: No-bake
- Cuisine: American
Ingredients
- 3.4 ounces instant chocolate pudding mix
- 2 cups cold milk
- 8 ounces whipped topping (thawed)
- 10–12 Oreo cookies (crushed)
- 32 gummy worms
Instructions
- In a mixing bowl, combine the cold milk and pudding mix. Whisk until well blended.
- Allow the mixture to thicken for about 5 minutes.
- Gently fold in the whipped topping until fully incorporated.
- Spoon the mixture into clear cups or glasses.
- Sprinkle crushed Oreos on top of the pudding layers.
- Add gummy worms for decoration.
- Chill in the refrigerator until ready to serve.
Nutrition
- Serving Size: 1 serving
- Calories: 320
- Sugar: 25g
- Sodium: 220mg
- Fat: 18g
- Saturated Fat: 10g
- Unsaturated Fat: 7g
- Trans Fat: 0g
- Carbohydrates: 36g
- Fiber: 2g
- Protein: 3g
- Cholesterol: 25mg